

Author: Kellie Hayden
Have you ever wondered how to make dyes that are safe for your small pet? Look no further! This how-to will give you the directions you need to make safe-to-chew dyes to color the new Enriched Life Design Your Own Hideaway House.
Helpful Notes
- As always, be sure to consult your veterinarian before trying these dyes. While we worked with our nutritionist to ensure we’re only suggesting ingredients that are safe for our core species, sometimes an individual animal’s needs are different than general recommendations.
- While these may be homemade dyes, give them the same consideration that you would any other kind of dye. These dyes may stain! Wear dark clothing or clothing that can be stained during this entire process. Quickly clean up any spills, and avoid using any utensils or containers that you particularly care about keeping stain-free.
- The goal when making these dyes is to let the dye solution reduce just the right amount. You want it to reduce—letting some water evaporate as it boils will provide a richer, more concentrated color! But if it reduces too much, you don’t have enough dye to work with (and adding more water if it’s reduced too much will dilute the color).
Setup
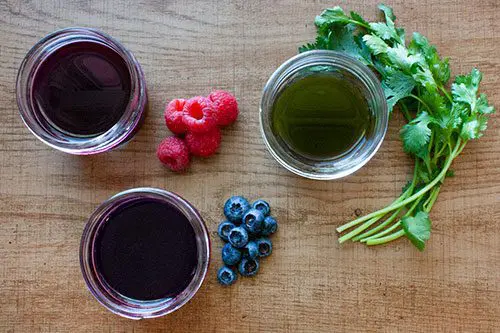
Select what foods you’re going to use. For this blog post we used cilantro (yellow-green dye), blueberries (purple dye), and raspberries (pink dye). Other options can include cabbage (indigo), turmeric (yellow), and strawberries (pink). We do not recommend using oranges or beetroot.
To get you started, 4 cups of water produced about 1 cup of dye each for the following produce items:
- 2 bunches of cilantro (1 cup of green dye)
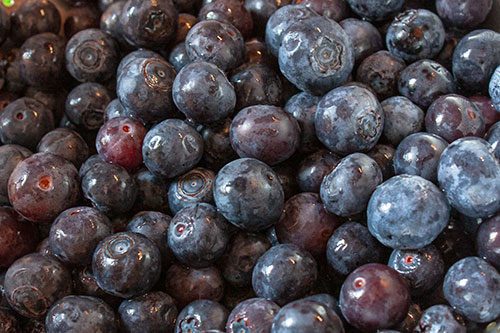
- 1 & ½ pint of blueberries (1 cup of purple dye)
- 12 ounces of raspberries (1 cup of pink dye)
While 1 cup might not seem like a lot, it’s usually more than enough to work with for painting.
Other materials you will need for this project include a measuring cup, a medium-sized pot, a wooden spoon, a funnel with a strainer attachment (or a sieve), mason jars with lids (or other containers that can be easily closed), newspapers, or old towels, a never-before-used paintbrush, and Oxbow’s Design Your Own Hideaway House.
Directions
The amount of water you use will vary between types of produce, but typically 4 cups of water is a good starting point.
- Bring 4 cups of water to a boil. Make sure the pot is a size where the produce can be comfortably submerged within the water.
Be sure to wash any produce you use for your dyes.
- Wash the produce thoroughly! Any residue like dirt that might be on the produce will end up in your dye if this step is skipped.
- Once the water is at a rolling boil, add one type of produce. Stir with a wooden spoon so the produce settles (some produce might float—that’s okay!).
- Boil on high heat for 5 minutes, then reduce to medium heat to maintain a light boil. Leave the pot uncovered. You can use the edge of the wooden spoon to lightly crush the produce and release a bit more pigment if you want, but don’t turn the produce into a pulp (this will make straining the dye later on more difficult!).
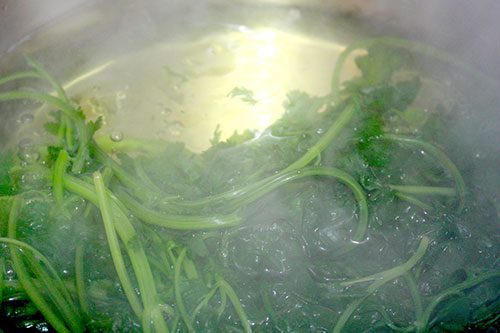
As your solution boils, you’ll be able to see the produce’s pigment moving into the water.
- Set alarms every 5 minutes. Stir the solution every time you check it and gauge whether or not the solution is evaporating too quickly. If it is, reduce heat to low-medium.
- The amount of time you spend boiling will vary by produce. After 30 minutes you can determine if you’re happy with the pigment. When you’re happy with it, turn off the heat, move the pot off the burner, and allow it to cool.
- Once the produce is cool enough to handle, you can squeeze the produce to get additional pigment. This step is optional—with berries we found this to not be necessary, but it is helpful with cilantro! It’s easiest to do this with a cheesecloth, but you can also use washed hands. Using hands might cause temporary stains on your skin!
- Dispose of or compost the boiled produce. Do NOT feed it to your pet.
- Carefully strain your dye into a mason jar. This is where a funnel with a strainer attachment is especially nice to have. If you only have a sieve, you can carefully drain the solution through the sieve into a food container with a wider opening. Whatever type of container you use, just make sure it has a well-fitting lid.
- Allow the dye to cool to room temperature, then close your jars and store them in the fridge. This colored dye should be considered perishable–you will want to use your dyes within a day or two and dispose of what you do not use.
- Rinse the pot to remove any remaining pigment and repeat this process with the other dyes you want to make!
Ready to Paint!
- Before opening the jars of dye, set up an art station with your assembled DIY Hideaway House. Newspaper or old towels can help protect your floor.
- You will need a new brush. Do not use a brush that has been used with other materials, such as various paints.
- Once your art station is ready, get out the dye jars and start painting!
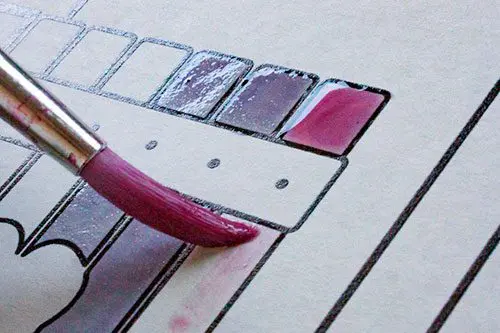
Some pigments, such as blueberry, may change color.
- Some dyes might change color as they dry. Blueberry dye, for example, appears magenta in the jar, but as it dries it becomes more of a purple shade!
- These dyes are similar to watercolors. If your dye looks diluted when you first apply it, remember that you can layer the dye to get a more vibrant look. Just wait for the first coat to dry before adding another layer.
- Once you’re done painting, you can dispose of your dyes by dumping them in the sink (again, be careful dumping them if you have a sink that may stain). Close the jars before picking them up and moving them—spilled dye is not something that anyone needs.
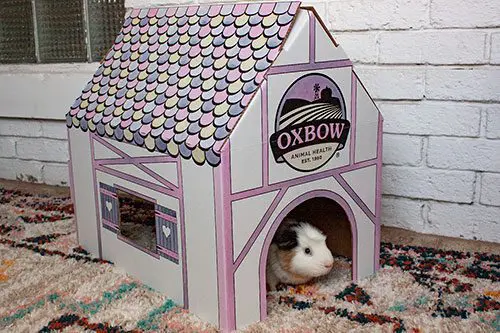
Make sure to let the corrugate dry before letting your little one explore. Jasper here is taking in the hideaway house’s spacious design.
- Allow the cottage to fully dry before moving it from your art station. Once it is completely dry, you can clean up your station and give your little one this new masterpiece to enjoy!
Be sure to show us your small pet with your creation when you’re done!